Simple Morph Shader
Walk through setting up a simple shader, from first principles. Our objective will be to create a shader that can morph between two shapes.
The end result will look like this:
Setup
First of all, we need to create our shader: Go to Assets > Create > Shader Graph > Sprite Unlit.
To have a pretty material editor later, which automatically handles the pixel ranges, let's use the improved shader UI.
In the Graph Settings tab of the Graph Inspector, set the Custom Editor GUI to
Kroltan.Keen.Editor.SpriteMaterialEditor.
Inputs
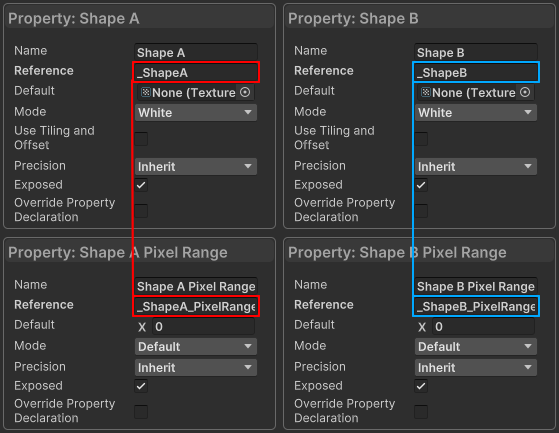
Now, we create our two shape inputs. Each distance field requires 2 properties to be used correctly:
- A texture for the distance field itself;
- A float for its pixel range.
They are related through each property's Reference name, if the texture is named Example,
then its pixel range must be named exactly Example_PixelRange.
Since we are going to use two shapes, we need two pairs of properties, so let's set that up. You should end up with four properties, each set up as seen below.
Now, let's add a property to control how to blend between the two shapes. Create a float property and name it Morph. Set its mode to Slider, with the default range of 0 to 1.
Reading the Distance Fields
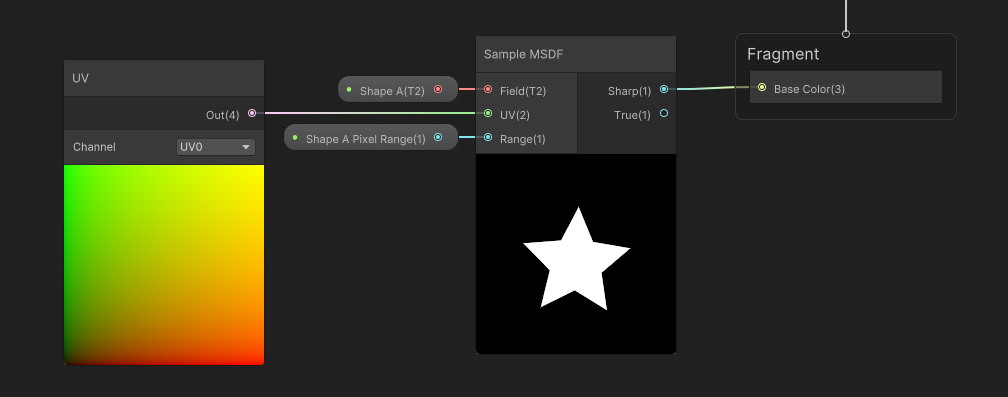
Now, we want to decode the shape textures into distance fields. To do that, we need to use the Sample MSDF node, connecting the distance field and the range to its input. We also need to tell it where in the texture to read, by connecting the UV socket to a UV node.
Progress Check
Right, but what are we doing so far? We just read a distance field and are doing nothing to it. To make sure we did everything right so far, let's rig up a little test:
Connect the Sharp output to a Distance to Mask node, and put that node's Mask output on the shader's Fragment Base Color output.
Make sure you save the shader! It should look something like this:
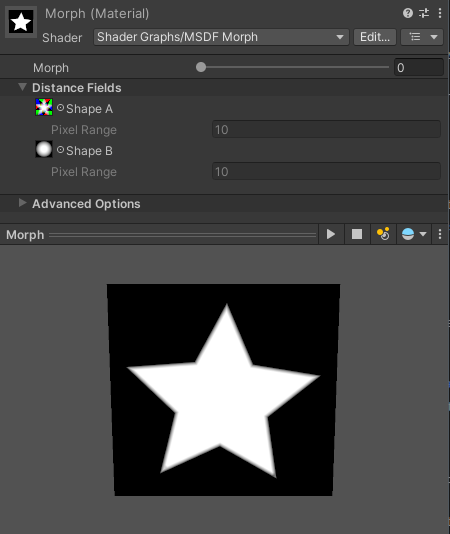
Now, create a Material and change its shader to the graph we are working on, and assign some imported SVGs to the Shape A and Shape B properties.
On the material Preview panel in the bottom, you should see the shape you just selected. If not, double-check your work.
Make it Work
Now, the fun part. Let's think about this morph effect by imagining the shape as some bread dough. We want to take the dough that is in one shape, and stretch it out or bunch it in to make it into another shape.
If we were working with meshes, or other natively vector formats, we would say something like "each vertex from shape A moves towards the closest equivalent in shape B". We don't have vertices, so we have to make do with our closest alternative.
Since distances vary continuously, and every point in the UV has a defined distance from either shape, if we want to gradually change one shape into another, a simple way to do it would be to gradually change one distance to another.
Lets try it out! Ensure you have done the previous step for both shapes, and now let's use a linear interpolation to change from the A distance to the B distance given some value of our Morph.
Create a Lerp node, and connect the Sharp distances from our A and B shapes to the respective inputs. Connect the Morph property to the T input of the Lerp. Your shader will be looking like so:
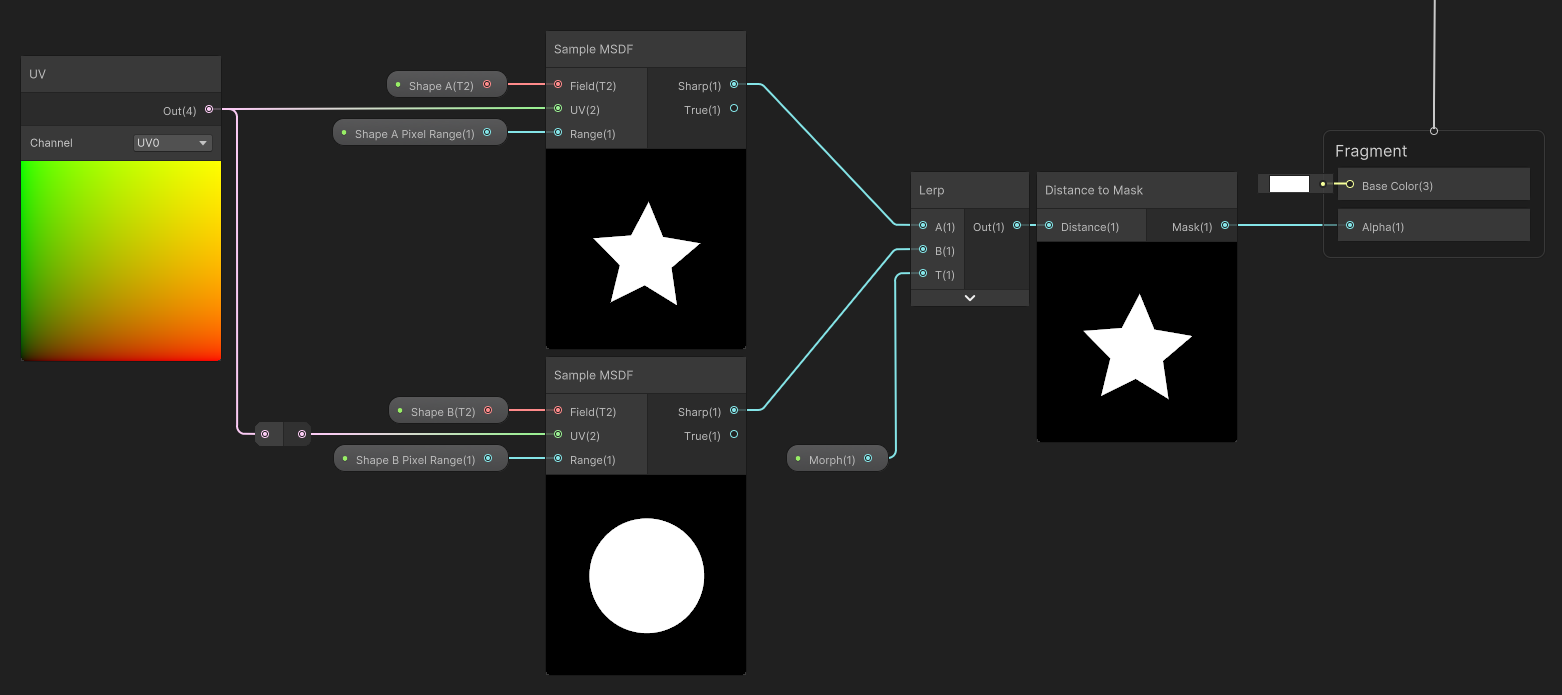
If we now replace the Distance input of the Distance to Mask node we created earlier with the output of the Lerp and save, we should be able to play around with the Morph slider in the Material!
Make it Right
If you observe carefully, our shader has a problem: It still looks fuzzy! By name we would expect the shapes drawn using this asset to be pretty Keen.
For a distance field to be rendered as sharply as possible while still retaining perfect anti-aliasing, we have to be careful with the range we provide to Distance to Mask.
Specifically, it must be proportional to the ratio at which the distance field is being drawn. When drawing to a plane perpendicular to the camera direction, such as an UI with no 3D rotation, it should be:
\(Range = Pixel Range \cdot { {Field Dimensions} \over {Displayed Size} }\)
The ImageDistanceField and SpriteDistanceField support doing this calculation for us, however, this is incorrect when rendering distance fields in perspective, such as on a wall in a 3D game.
For the perspective case, we can use the Perspective-aware Range node to massage the pixel ranges into the correct scale for any situation.
So, let's use it! Add the Perspective-aware Range between the Pixel Range property and Distance to Mask node, plugging the respective shape and our UV into it.
The shader should now look like this:
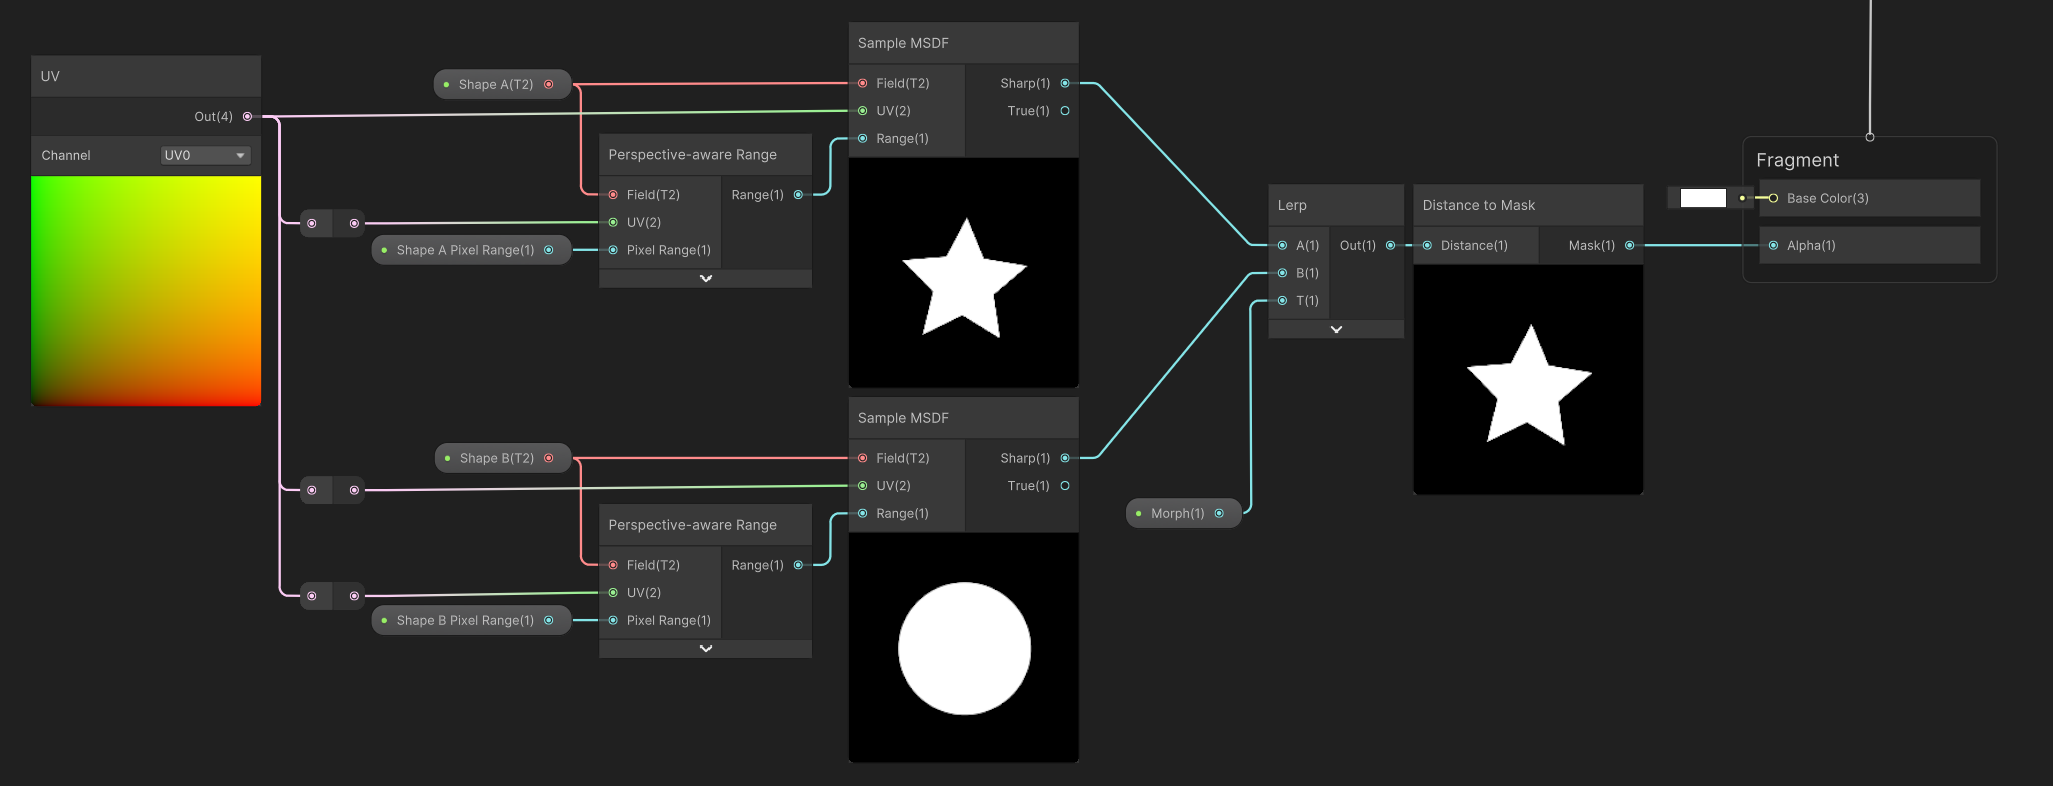
And if you save the graph and look at our material again, it should now look sharp! Well, mostly. Near the midpoint of the morph, there are still some fuzzy areas.
But our pixel range handling is correct! "What gives?", you might ask. The issue now is our choice of morphing function: a linear interpolation of distances is not a distance by itself, because it distorts each point in the field based on the difference of distances, which is different for every point in the field.
This is a fundamental property of distance fields, if you want to maintain their useful properties, then you must strive to distort them as little as possible. Take a look at Understanding Signed Distance Fields for a more in-depth look.
To fix this we would need to go for a bit of a different effect, such as Smooth Minimum, and so it would be as much an artistic decision as a technical one, so I'll leave it to you.
Conclusion
That's it! We have seen how to create a simple visual effect based on distance field textures.
If you ever need a brief refresher, the Guide: Custom Shaders section is your friend.